
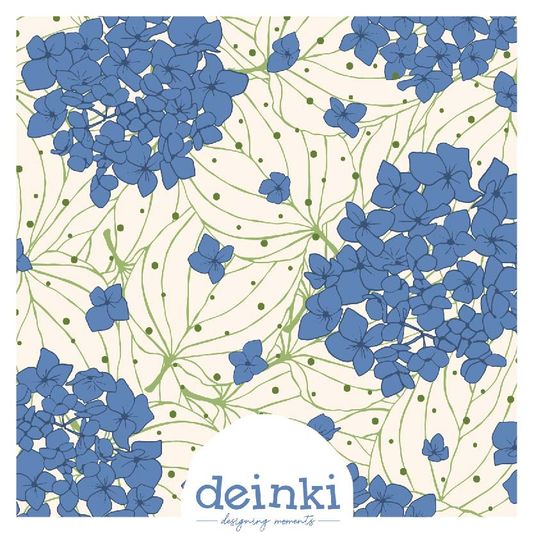
When I first started making textile repeating patterns, I was just happy when they repeated perfectly. After a while my expectations got up and wasn't happy anymore with "just a pattern". I decided to experiment different ways of adding something *extra* to the pattern to make them more special and eye-catching. Here are 5 ideas worth trying:
Adding texture
Nowadays, new apps and programs allows us to add intricate textures to our designs. These are a bit trickier if you work with vector-based programs like Illustrator instead of raster-based (like Procreate or Photoshop) but not impossible!! You can purchase great texture bundles on sites like Creative Market (always taking care that you purchase the right kind of license) or what's more fun, create your own. The difficult part is make the texture also repeat within the pattern, and that you don't get "spots" of texture that reveals your repeat too easily.

Do you see how the texture add interest to the tree's trunk and to the geometric background?
Filling gaps
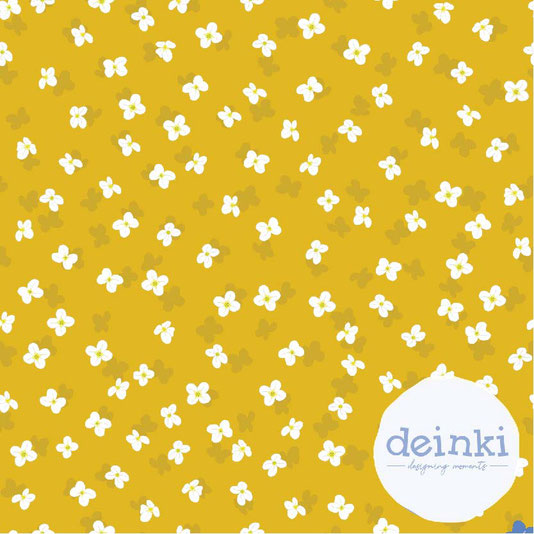
Sometimes, we have a great composition but there is too much negative space between the motifs and we feel the need to fill it up, to create a better flow and add little details. Don't get me wrong, sometimes, "less is actually more" but sometimes, something is just "missing". You can for example fill the gaps with dots or you can fill it with parts of the main objects. Let me show you some examples to be more clear:
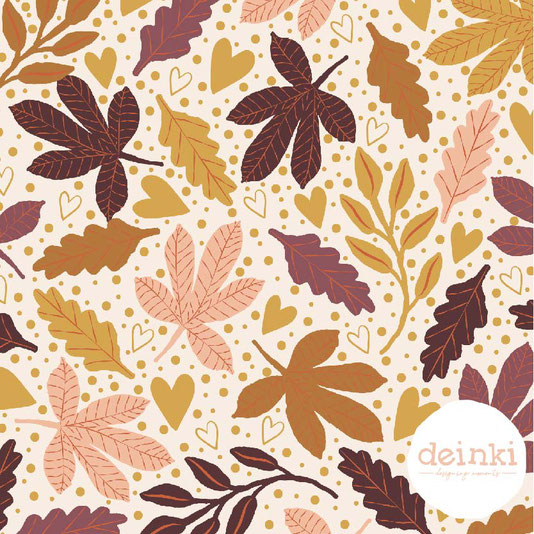
Here I filled the background with dots in two different sizes as well as with plain and lined hearts.
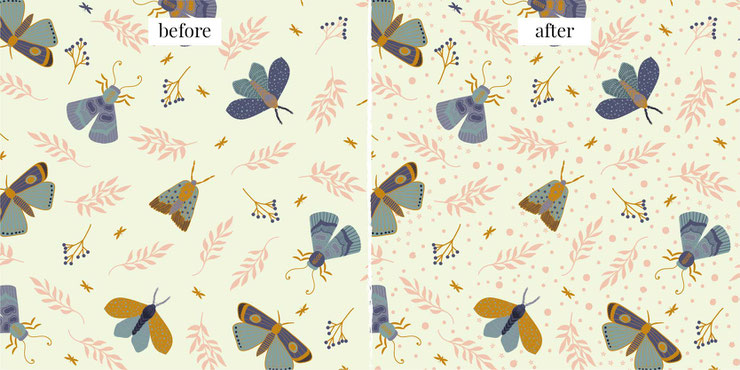
You notice the difference between these two patterns, right?
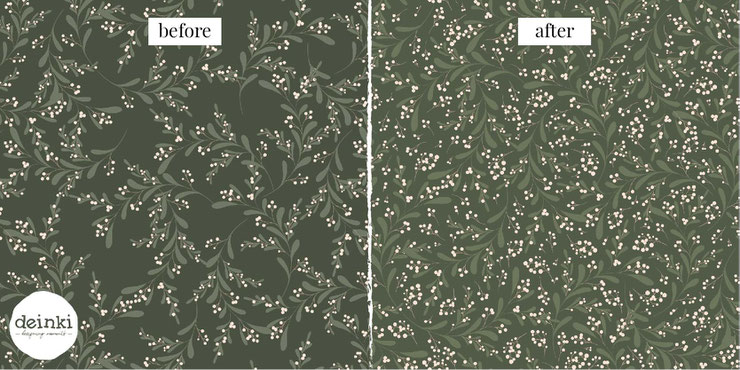
This "holes" drove me crazy, so I filled the negative space with more little elements of the mistletoe.
Adding shadows
This is also a great resource: creating a sort of "shadow" of the motifs. This will add another level of depth to the pattern in two ways:
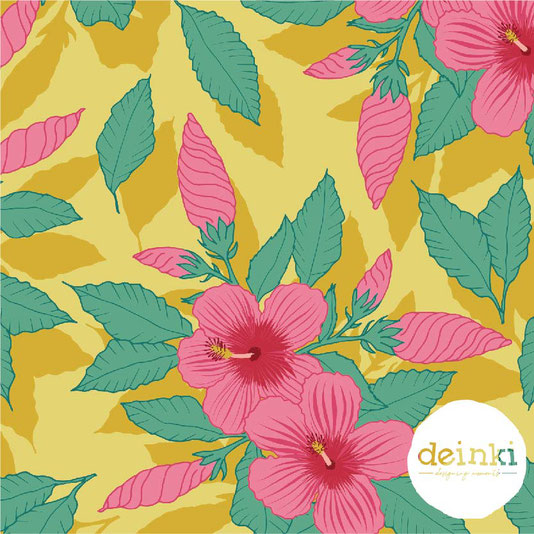
The shadow effect applies also great for this tropical pattern since it enhances the feeling of sun and summer.
In this pattern, the shadow is random.

Pattern-in-pattern (simple)
This technique consists of adding a background pattern inside the main pattern. It has to do with something simple like polka or random dots, stripes, checks and so on. When doing this, you have to consider the size of the main repeat and make the background repeat either of the same size or scalable. That means if your rapport is 30x30 cm, the background repeat might be equally wide and high, e.g. 15X15 cm (background pattern will appear twice in width and height) or have different width and height, e.g. 5x10 cm (background pattern will appear 6x in width and 3x in height):

A tonal polka-dot pattern in the background.
Textured vertical stripes in the background.
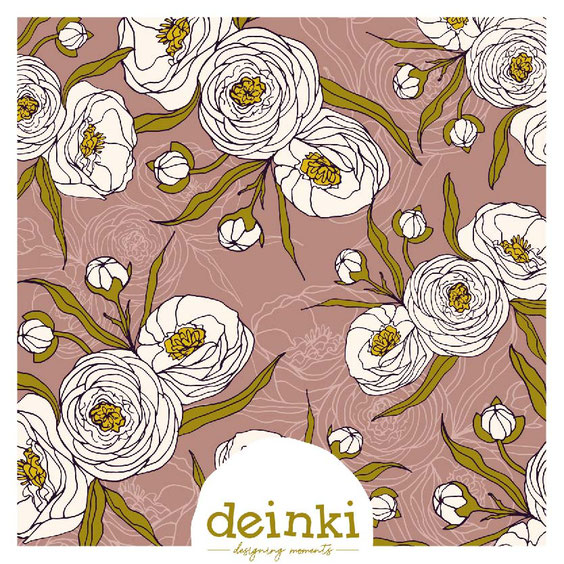
Pattern-in-pattern (complex)
This technique is like the previous one, but the in this case, both patterns are complex. Here too, you have to consider the size of the main repeat and make the background repeat either of the same size or scalable. Here are some examples:
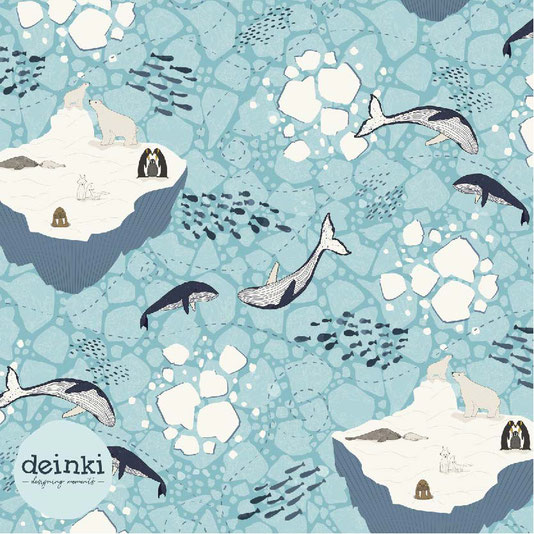
The ice chunks pattern in the background fits twice in the width of the main pattern. Besides, this pattern is a half-drop.
I'm still not 100% happy with this pattern, but for the purpose of showing the background it's ok.
Bonus I
Play with plains and lines!
Look at this pattern:It's a complex pattern-in-pattern, in this case,
it's the same pattern only the background pattern is in line and shifted:
Bonus II
Play and experiment with some techniques at the same time!
Look at this pattern: You'll see the technique of filling gaps with dots,
with parts of the motifs as well as the complex pattern-in-pattern technique mixed with playing with the lines of bonus I:
What do you think?
Let me know in the comments below!
Stay tuned for the next blog post:


Write a comment